Last week we discussed the importance of Social Media for marketing your small business, and this week we would like to get into much more detail about exactly how you can begin to grow the online footprint for your business using Facebook. In this blog, we will get you started by helping you create your initial Facebook account.
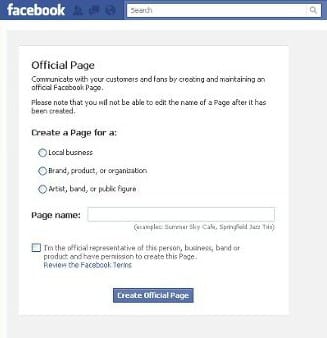
Once you have created your own account, you can go to THIS page to begin creating the official page for your business. Select the option for Local Business, and when creating the name, remember this: Once you choose a name for this Official page, it cannot be changed, so consider the name of the page a bit before you make a final decision. You should keep it simple and easy to find. You must also click the box at the bottom of the page that denotes you as the official representative for the company’s page, then you click ‘Create Official Page”.
To get the page off of the ground right away, you’ll need a .jpg file of your business’ logo that you’ll enter as the profile picture. It will always appear to the left of the business name on your profile. When you look at your profile, you will see a series of tabs at the top, and the two that you need to worry about right away are the “Info” and “Wall” tabs. In the info tab, you need to enter just some basics about your business: history or biography, location, hours, phone number, address, website url and parking information. Anything that will help a person understand what business that you’re in, where your business is and how they can get there or contact you.
 The Wall is where you will post “Status Updates”, which you can use to deliver message to your customers. This “Wall” will be your main billboard for whatever messaging that you want to convey to your customers that follow you on FB. At the top of the page there is an empty box that reads, “What’s On Your Mind?” This is where you will post your messages to customers. We will go into more detail next week about posting links, photos and videos to increase your engagement with your customers.
We hope this gets you off the ground with your Facebook marketing for your local business, and next week we will get more into how to build your Facebook page out and how to grow your fan base. We will also touch on Twitter, it’s impacts and what the first steps are to getting your business Tweeting.
Have a great Thanksgiving!